Move from Redux to MobX - reduce boilerplate
MobX is a statement management library. Unlike Redux it doesn't require a lot of boilerplate code. In this post we'll talk how you can benefit from using MobX vs Redux.
Video version
There's a video version of this article that I originally recorded for the React Native London. If you prefer to read text, just scroll below.
Problem with Redux
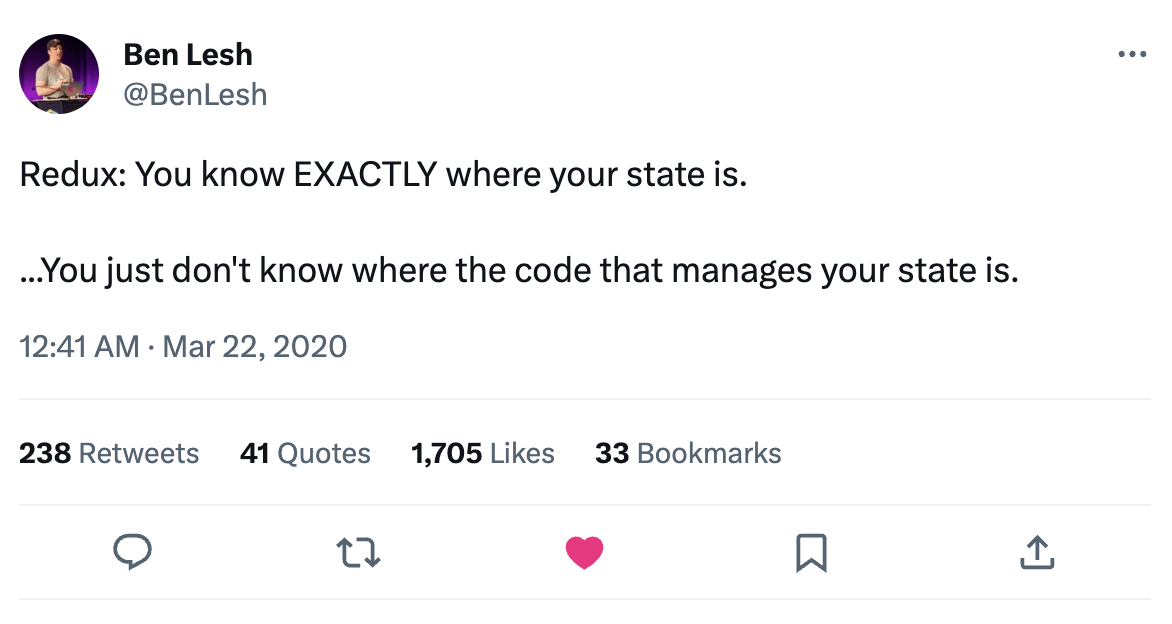
Redux is great for extracting application state and business logic out of components. However, you end up with a lot of boilerplate. Your code will be scattered around many different place. Think of a typical user action - usually, you have to write an action definition, an action creator, and finally a reducer. Now, imagine you have a bug in that action - you'll have to trace it in at least two different places - an action creator and a reducer.
This tweet by Ben Lesh - a member of the RxJS core team - perfectly summarises that.

Enter MobX
MobX allows you to manage your state in a far more concise way. It's a fairly simple library that you can get started with in almost no time. It's got more than 400k+ weekly downloads on NPM. And many companies, including mine, use it in production.
Unlike, Redux, it's not afraid to mutate state. In fact, it's based on the observer pattern which is all about mutations and reactions to them.
Instead of doing a theoretical introduction of MobX, I'll use an example. We'll build a simple application first with Redux and then'll we'll move it to Mobx, while gradually explaining its concepts.
Sample app
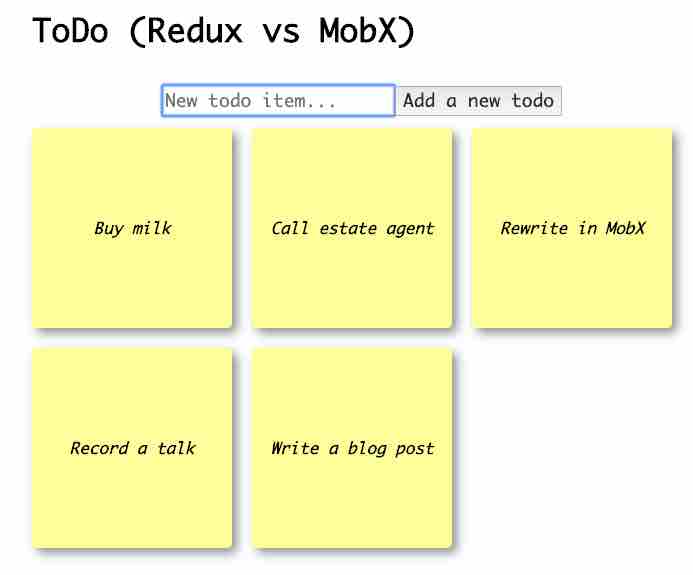
The sample app is a classis todo app:
- You can see a list of todo items
- You can add new ones
- And all of that will be done via the API calls
- That's to make comparison between Redux and MobX more interesting
- After all, in real world we get and save data via APIs most of the time

App code with Redux
First of all, the Redux app needs action creators.
There'll be two action creators:
addTodo()getTodos()
Since we need to send API requests, there'll be a bit of complexity - we'll have to return a function an async function from the action creators.
store/action-creators.js
import { GET_TODOS } from "./constants";

export const addTodo = (todo) => {
  return async (dispatch) => {
    await fetch("http://localhost:9999/todos", {
      method: "post",
      body: todo,
    });

    dispatch(getTodos());
  };
};

export const getTodos = () => {
  return async (dispatch) => {
    const res = await fetch("http://localhost:9999/todos");
    const { todos } = await res.json();

    dispatch({
      type: GET_TODOS,
      todos,
    });
  };
};
Then we need to add reducers that will set the initial state and modify it once the actions are dispatched.
store/reducers.js
import { ADD_TODO, GET_TODOS } from "./constants";

const initialState = {
  todos: [],
};

const todos = (state = initialState, action) => {
  switch (action.type) {
    case ADD_TODO: {
      return {
        ...state,
        todos: [...state.todos, action.todo],
      };
    }
    case GET_TODOS: {
      return {
        ...state,
        todos: action.todos,
      };
    }
    default:
      return state;
  }
};
We need to throw a few constants in the mix, so that the reducers module doesn't depend on the action creator one and vice versa.
store/constants.js
export default todos;

export const ADD_TODO = "ADD_TODO";

export const GET_TODOS = "GET_TODOS";
Finally, we need to wire it app together and call createStore().
store/store.jsx
import { applyMiddleware, createStore } from "redux";
import thunkMiddleware from "redux-thunk";
import todos from "./reducers";

export default createStore(todos, applyMiddleware(thunkMiddleware));
Redux store so far
It feels like we had to write a lot of code for such a small application, doesn't it?
Redux wiring
As the final step we have to inject the store into the application context:
index.jsx
import React from "react";
import ReactDOM from "react-dom";
import { Provider } from "react-redux";
import store from "./store/store";
import App from "./App";

ReactDOM.render(
  <React.StrictMode>
    <Provider store={store}>
      <App />
    </Provider>
  </React.StrictMode>,
  document.getElementById("root")
);
Components
What about the components. We left them till the end, but they are not particularly complicated:
Todos/Todos.jsx
import React, { useEffect } from "react";
import { connect } from "react-redux";
import { getTodos } from "../store/action-creators";
import "./Todo.css";

const Todos = ({ todos, getTodos }) => {
  useEffect(() => {
    getTodos();
  }, [getTodos]);

  return (
    <div className="list">
      {todos.map((todo, index) => (
        <div key={index} className="todo">
          {todo}
        </div>
      ))}
    </div>
  );
};

const mapStateToProps = (state) => ({
  todos: state.todos,
});

const mapDispatchToProps = (dispatch) => ({
  getTodos: () => {
    dispatch(getTodos());
  },
});

export default connect(mapStateToProps, mapDispatchToProps)(Todos);
Todos/Todos.jsx
import React, { useState } from "react";
import { connect } from "react-redux";
import { addTodo } from "../store/action-creators";
import "./NewTodo.css";

const NewTodo = ({ addTodo }) => {
  const [todo, setTodo] = useState("");

  return (
    <div>
      <input
        type="text"
        onChange={(e) => setTodo(e.target.value)}
        placeholder="New todo item..."
        className="new-todo"
      />

      <button onClick={() => addTodo(todo)} className="new-todo-button">
        Add a new todo
      </button>
    </div>
  );
};

const mapDispatchToProps = (dispatch) => ({
  addTodo: (todo) => dispatch(addTodo(todo)),
});

export default connect(null, mapDispatchToProps)(NewTodo);
Enter MobX
Now, remember a very verbose Redux store we wrote? Let's see how we re-write it in MobX.
import { observable, action } from "mobx";

export default class TodoStore {
  @observable
  todos = [];

  @action
  async addTodo(todo) {
    await fetch("http://localhost:9999/todos", {
      method: "post",
      body: todo,
    });

    this.getTodos();
  }

  @action
  async getTodos() {
    const res = await fetch("http://localhost:9999/todos");

    const { todos } = await res.json();

    this.todos = todos;
  }
}
And that's it! Those mere 25 lines of code replace Redux's action creators, reducers, and the other bits!
Now, we have a very concise store that both has an application state and business logic, yet doesn't mix them together. Indeed, MobX stores are a great answer to the question - 'Where do I put my business logic and HTTP calls in React?'. Also, MobX stores are extremely easy to unit test.
Okay, but how is it possible? Let's dive into the code.
MobX observables
First of all, we declare an array that will hold todo items and mark it as an observable:
@observable
todos = []
What does the @observable annotation mean? It means that all the changes to the array will be monitored and all the observers will be notified? What are the observers? Usually, they are React components that reference observables. And they are re-rendered if corresponding observables change. We'll have a look at it below.
Now, having declared the data, we need to declare operations that can be performed on it. And, in our case, there are two:
- Adding a new item
- Getting todos
And you can see that they are declared as class methods and have the @action annotation:
store/store.js
@action
async addTodo(todo) {
  await fetch('http://localhost:9999/todos', {
    method: 'post',
    body: todo
  });

  this.getTodos();
}

@action
async getTodos() {
  const res = await fetch('http://localhost:9999/todos');

  const { todos } = await res.json();

  this.todos = todos;
}
}
Both addTodo() and getTodos() are just regular functions that make HTTP calls and update some data. The only two special things are:
- They have the
@actionannotation - The data they modify -
this.todosis marked as@observable.
Why does the methods need to be annotated with @action?
First of all, it's a nice convention that clearly marks methods that modify observable data. Secondly, MobX does performance optimisation if observable data is mutated in an action. Finally, MobX has a strict mode that would throw an exception if observables are modified outside of the actions.
Finally, you need to change the root of your application to this:
index.jsx
import React from "react";
import ReactDOM from "react-dom";
import { Provider } from "mobx-react";
import TodoStore from "./store/store";
import App from "./App";

ReactDOM.render(
  <React.StrictMode>
    <Provider todoStore={new TodoStore()}>
      <App />
    </Provider>
  </React.StrictMode>,
  document.getElementById("root")
);
It's almost exactly the same as the one for Redux. The only difference is that we import Provider from a different module.
Components in MobX - observers
Okay, we have re-written the store in MobX. It does look much more concise than the one in Redux. But what about the components? Will they need much re-write?
Luckily, no! Let's examine the Todos component that is now MobX enabled:
Todos/Todos.jsx
import React, { useEffect } from "react";
import { observer, inject } from "mobx-react";
import "./Todo.css";

const Todos = ({ todoStore }) => {
  useEffect(() => {
    todoStore.getTodos();
  }, [todoStore]);

  return (
    <div className="list">
      {todoStore.todos.map((todo, index) => (
        <div key={index} className="todo">
          {todo}
        </div>
      ))}
    </div>
  );
};

export default inject(({ todoStore }) => ({ todoStore }))(observer(Todos));
As you can see the component stayed largely unchanged. Similarly, to the Redux version it receives a property, but this time the property contains a MobX store that have a list of todos. It doesn't need need the mapStateToProps(). Instead, of connect() we have inject() that, as the name suggests, injects the data store into the component.
The most crucial thing that the component is wrapped inside the observer() function. As mentioned before, components wrapped inside observer() will be re-rendered once observable change.
Will all observer components re-render if any observable changes?
No! MobX is smart enough only to trigger re-rendering of the components read observables that get changed. For example, if you have a component that reads from the observable called todos, but it the the @observable employees that gets changed, then your component will not be re-rendered.
What about components that modify data?
Easy!
NewTodo/NewTodo.jsx
import React, { useState } from "react";
import { inject } from "mobx-react";
import "./NewTodo.css";

const NewTodo = ({ todoStore }) => {
  const [todo, setTodo] = useState("");

  return (
    <div>
      <input
        type="text"
        onChange={(e) => setTodo(e.target.value)}
        placeholder="New todo item..."
        className="new-todo"
      />

      <button
        onClick={() => todoStore.addTodo(todo)}
        className="new-todo-button"
      >
        Add a new todo
      </button>
    </div>
  );
};

export default inject(({ todoStore }) => ({ todoStore }))(NewTodo);
Once again, it's very similar to its Redux version. And unlike the Todos component we don't need to wrap it inside observer. Indeed, NewTodo doesn't need to be rendered when todos change. We just need to inject the store with inject().
Source code
The source code of both the Redux and the MobX version is available on Github. It also includes the API server. So you can all run it.
Conclusion
- MobX is a great and mature solution for state management of React applications
- You'll have almost zero boilerplate in comparison to Redux
- MobX stores are great place for business logic and HTTP requests
- Give it a try
- Have questions? There might be a few answers below
Q&A
- What about hooks?
- The example above shows that MobX works nicely with React hooks such as
useEffect()anduseState()
- The example above shows that MobX works nicely with React hooks such as
- But React Redux also has
useSelector()anduseDispatch()?- So does MobX React have
useObserver()anduseStores()that you can use instead ofobserver()andinject(). - Personally, I prefer the HoCs -
observer()andinject()because they make it easier to unit test components. But that could be a matter of taste.
- So does MobX React have
- Can you have more than one store?
- Easily! You can have as many stores as you want.
- I recommend having a store per feature
- We have around 15 stores on the product I'm working on
- Does it come with debug tools?
- MobX comes with a great trace module
- Plus, you can use the standard React devtools to understand why components got re-rendered
- Do you have to use ES decorators?
- No. Each ES decorator has a corresponding function which allows to wrap your variables/class properties and components
- Does MobX work with any kind of component?
- You can mark 'fat' and simple functional components as
observer - But you cannot do that with
PureComponents
- You can mark 'fat' and simple functional components as
The opinions expressed herein are my own personal opinions and do not represent my employer's view in any way. My personal thoughts tend to change, hence the articles in this blog might not provide an accurate reflection of my present standpoint.
© Mike Borozdin